Sunday, March 30, 2014

Chicken and Rice

The finished chicken and rice paired with sautéed peppers
and onions.
(Photo: Morgan Nacewski)
Since creating this blog, I have cooked up some wonderful Crockpot meals. They are all unique in flavor, extremely easy to make and appealing to various consumers. The one problem I have run into is having an abundance of leftovers. Crockpot recipes often produce a large portion, and when you are only cooking for two, it is easy to run into this problem. 
The large portion the recipe produces is way too much
food for two individuals.
(Photo: Morgan Nacewski)

My solution to this was finding a "Plain Jane" kind of meal. There are a number of  advantages to a blander-style dish. I view a "Plain Jane" meal as a blank canvas.
You can add a unique twist to the meal every time you eat it like a new side. This makes the dish feel like less of a "leftover" and more like a series of new dishes. 

Chicken and rice is a great example of a "Plain Jane" meal. It consists of only a protein and a grain, but has endless possibilities. The recipe I used for this chicken and rice was found in the Crockpot Recipe Card Collection, the same place I found the macaroni and cheese recipe. 
All of the ingredients needed to make the
chicken and rice with the exception of the
chopped celery.
(Photo: Morgan Nacewski)

CHICKEN AND RICE
3 cans of condensed cream of chicken soup
2 cups of uncooked instant rice 
1 cup of water 
1 pound of boneless, skinless chicken breasts
1/4 teaspoon of salt 
1/4 teaspoon of paprika 
1/4 teaspoon of black pepper
1/2 cup of diced celery 

The only preparation that is required for the recipe is to dice the celery. As always, you simply place all of the ingredients into the Crockpot. Then turn the Crockpot on the highest setting and allow the ingredients to sit for four hours. Since this recipe does involve rice, I took it upon myself to stir the contents at least twice an hour. If you choose not to stir, it is quite possible that the rice will not cook as evenly. 

Before hour four comes to an end, you must choose a side to accompany the chicken and rice. Naturally, I chose to make sautéed pepper and onions because the photo on the recipe card depicts the dish with that side. In order to do this I simply sliced up an onion and red bell pepper. Next, I placed both into a pan with olive oil, pepper, garlic salt and a splash of teriyaki dressing. After a few minutes the vegetables will soften and are ready to serve.

The sliced vegetables only need a few spices
and a few minutes to transform into the perfect
side dish.
(Photo: Morgan Nacewski)

The sautéed vegetables complemented the chicken and rice wonderfully, but do not be afraid to pair the dish with something else. To make the meal a bit more hearty, you could add a nice piece of cornbread. A fresh garden salad would also be a great addition. You could also make some beans or salsa to give the dish a more Mexican vibe. 

The beauty behind chicken and rice is its versatility. Since the dish is so simple, it can easily be transformed and taken into countless directions. I know that I have given numerous suggestions on what to pair with the chicken and rice, but you should also know that the dish is also strong enough to stand alone. I hope you give this recipe a try and would love to see how yours turns out! Feel free to comment below with questions and thoughts. 

Monday, March 24, 2014

Macaroni and Cheese

The finished macaroni and cheese garnished lightly with
extra salt and pepper.
(Photo: Morgan Nacewski)
College is an amazing time, but it can also be a stressful one. Some weeks include an immense amount of stress due to projects, tests and social obligations. Last week my roommate and I were both suffering from one of these weeks.  Therefore when it came to choosing a Crockpot recipe for this week's blog, my mind immediately went to comfort food. 

The definition of comfort food tends to vary from person to person, but most can agree that macaroni and cheese definitely meets the criteria. It is warm, cheesy and has a way of bringing you back to your childhood days. I believe the "comforting" aspect of macaroni and cheese is one of the many reasons it is so popular amongst college students. Sometimes during one of our stressful weeks, a comforting meal is exactly what we need. This recipe serves as the perfect fix and blows "Easy Mac" out of the water.
The recipe requires you to cook the
six cups of macaroni prior to adding
it to the Crockpot.
(Photo: Morgan Nacewski)


Crockpot Recipe Card Collection
containing the macaroni and cheese
recipe used for blog.
(Photo: Morgan Nacewski)
Since I was aiming for a homestyle macaroni and cheese recipe, I avoided all the recipes found on trendy, health websites. In the end, I decided to use the recipe provided by the Crockpot brand itself and found this particular recipe in my mother's Crockpot Recipe Card Collection.  This macaroni and cheese requires a little more work than my past two recipes, but it is well worth it in the end. 


Although there are only four ingredients necessary for purchase,
you will need large quantities of each.
(Photo: Morgan Nacewski)
MACARONI AND CHEESE 
6 cups of cooked elbow macaroni
2 tablespoons of butter
4 cups of evaporated milk
6 cups of Cheddar cheese, shredded 
2 teaspoons of salt 
1 teaspoon of black pepper 

The first step is to cook the elbow macaroni and drain completely. Next you will simply mix all of the ingredients together. The directions say to mix all of the ingredients in a mixing bowl, but for convenience I mixed them in the actual Crockpot before turning it on. Once the ingredients appear to be evenly dispersed, cover the cooker and place it on the highest setting. 
The ingredients need to be well mixed in the Crockpot so
they are evenly dispersed.
(Photo: Morgan Nacewski)

The macaroni and cheese takes about three hours to cook completely. Since the recipe includes so much cheese, I found it affective to stir the ingredients approximately every half hour. When completed, you may add extra salt and pepper to your liking. 
Within the three hours the cheese will melt perfectly and
golden at the very top.
(Photo: Morgan Nacewski)

This macaroni serves as a great side, snack and can stand as a meal on its own. The recipe produces up to ten servings, so the dish can be eaten here and there for a number of days. In our case, the macaroni did not last quite as long due to the fact so many of my friends enjoyed it throughout the weekend. My roommate, a self-proclaimed "macaroni connoisseur", loved the homestyle taste and consumed numerous helpings.

As strange as it sounds, this meal was therapeutic during a hectic few days. Macaroni is a classic American meal that we have been enjoying since our childhood. It has a quality that puts us at ease and lets us simply enjoy. I hope you put this recipe to good use, whether it's when you are seeking comfort or just a delicious meal. As always, please comment below with any thoughts or questions. 

Sunday, March 16, 2014

Pulled Pork Sliders

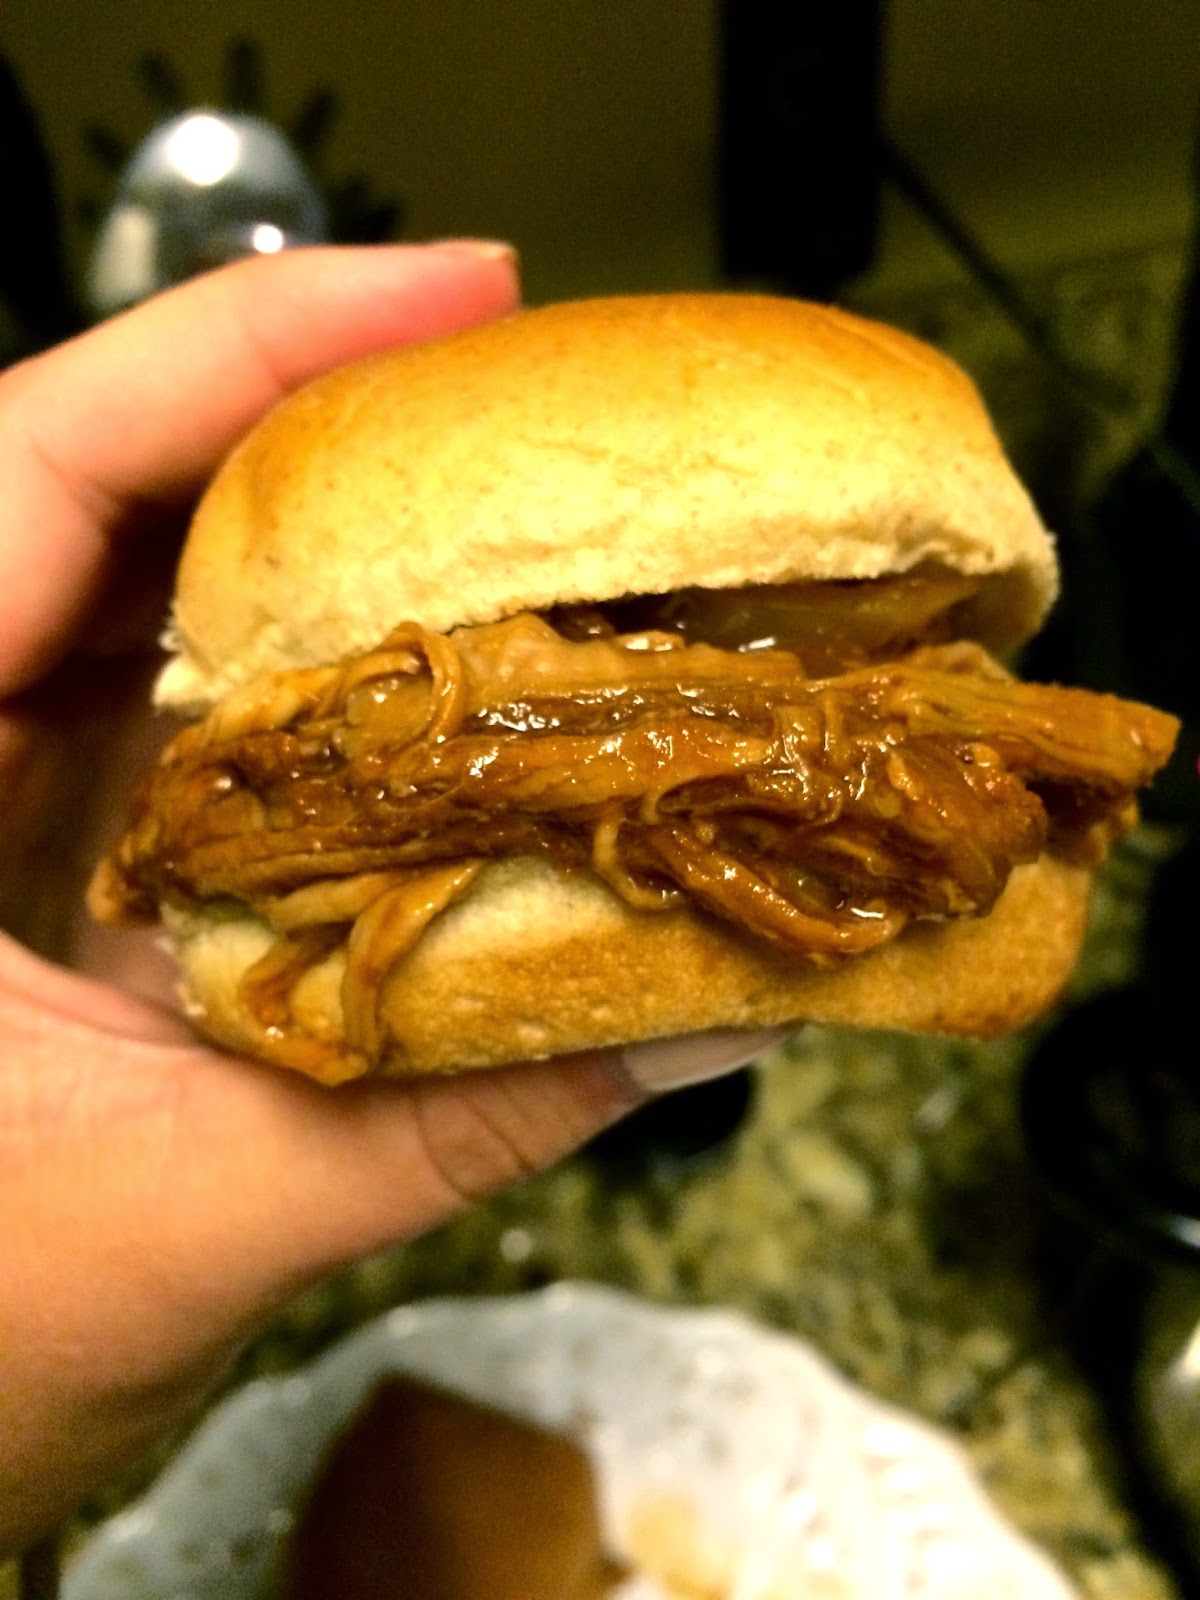
A finished pulled pork slider is shown with cole slaw and a
pickle, but the side possibilities for the sandwich are endless.
(Photo: Morgan Nacewski)
Barbecue is one of the many iconic attributes of the South. It encompasses a broad spectrum of dishes, all featuring a tendered meat covered a in sweet, southern sauce. Since barbecue is characterized by meat that is slowly cooked, it comes as no surprise that a slow cooker, like a Crockpot, is the perfect tool to create a barbecue dish.

Pulled pork is one example of barbecue and my personal favorite. It is commonly served in the form of a sandwich, making it less messy and more filling. Pulled pork sandwiches are very popular amongst my college friends, so I thought this would be a great recipe to share with my blog readers.


There are only four items necessary to create the pulled
pork sliders, which can feed up to eight people.
(Photo: Morgan Nacewski)
The original pulled pork slider recipe can be found on the following website: southernfood.com. Just like last week's tortilla soup, I have altered the recipe to my liking and encourage you to do the same. The recipe I used today is listed below.

PULLED PORK SLIDERS
1 uncooked pork shoulder roast (4 pounds)
1 medium onion (chopped)
1 cup of water
1 bottle of barbecue sauce
1 package of buns

Place all of the ingredients in the Crockpot with the exception of the buns. Put the Crockpot on the highest setting and let the ingredients sit for six hours. The pork will be nice and tender when complete. If necessary, take portions of the pork and shred them into smaller pieces before placing them on the buns.
The ingredients transform into delicious
pulled pork sliders in six hours, with the
Crockpot doing all the work for you.
(Photo: Morgan Nacewski)

One of the great things about this dish is that the ingredients total to less than $15, making the meal extremely reasonable for college students. You can also personalize the recipe because the brand of barbecue sauce and buns are completely up to you. Personally, Sweet Baby Ray's brand of barbecue sauce is my favorite because of its sweet honey flavor. The Pepperidge Farm slider wheat buns are the buns I prefer to use.


The pulled pork slider is smaller than the average
sandwich, making it extremely easy to eat on the go.
(Photo: Morgan Nacewski)
I have found that serving the slider-size sandwiches help you get the most out of the recipe. Even though the portions are smaller, it allows you to produce more servings. Using these smaller portions has proven to be less wasteful compared to serving over-sized sandwiches that no one can finish.

Pulled pork sliders are a college student's dream. They are unbelievably easy to make, inexpensive and extremely filling. These sliders are perfect for any college game day and feeding the masses. The meat can be stored for a number of days and are complemented by a variety of sides.

I hope you enjoy give this barbecue Crockpot meal a try, I assure you it will not disappoint. As always, feel free to give feedback or ask further questions by commenting below.

Monday, March 3, 2014

Tex-Mex Tortilla Soup

I have lived in Texas my entire life, therefore it is no surprise that "Tex-Mex" has become one of my favorite types of food growing up. For those of you who don't know, Tex-Mex is a beautiful blend of both Texas and Mexican cuisine. 

One of the many dishes placed in the Tex-Mex category is tortilla soup. Tortilla soup is a broth-based soup with added vegetables, chicken and crisped corn tortillas. It is an extremely popular meal and can be found at virtually any Tex-Mex or Mexican restaurant.

Although it seems like a meal you can only enjoy at restaurants, it is surprisingly easy to make yourself. All you need is a Crockpot cooker, a few ingredients, five minutes of preparation time and four hours to let the soup simmer. The recipe I use can be found on http://www.keyingredient.com/recipes/66118304/healthy-crock-pot-chicken-tortilla-soup/. I made subtle changes to this recipe and you are welcome to tweak it to your liking. 
All the ingredients necessary for chicken tortilla soup,
totaling under $15.
(Photo: Morgan Nacewski)

CHICKEN TORTILLA SOUP
4 uncooked chicken breasts 
1 can of crushed tomatoes undrained 
1 can of red enchilada sauce 
1 can of black beans
1 can of diced tomatoes with green chiles 
1 medium onion, chopped
1 tablespoon of garlic 
1 package of frozen corn (14 ounces)
1 box of chicken broth (14 ounces)
1 teaspoon of chili powder
1 package of corn tortillas 


Place all of the ingredients with the exception of the corn tortillas into the Crockpot. Put the Crockpot on the highest setting and let ingredients sit for 4 hours. 
A few minutes in the oven will turn
average corn tortillas into golden
tortilla chips that make the perfect
topping for the soup.
(Photo: Morgan Nacewski)

About 20 minutes prior to serving, preheat oven to 400 F. Slice the corn tortillas into small strips, place strips on a baking sheet and spray will non-stick cooking spray. Place tortilla strips in oven for 12 minutes or until golden brown. 

When serving the soup, I prefer to keep the Crockpot on the "warm" setting so the soup stays a good temperature. It is also nice to garnish the soup with fresh avocado and cheese.  

This tortilla soup has become a go-to meal for me throughout college. It is a simple, inexpensive meal that can feed a number of people. All of my friends really enjoy the flavor and "restaurant" quality it possesses. It is very easy to store, lasts for days and can simply be reheated in the microwave. It is a meal you can throw together before class and enjoy by the time you get home. I hope that you enjoy the soup, feel free to give feedback by commenting below. 
The finished tortilla soup garnished with corn tortilla chips, avocado and cheese.
Serving size is about 2 cups and up to 15 servings can be made out of the recipe.
(Photo: Morgan Nacewski)